
- Posted on
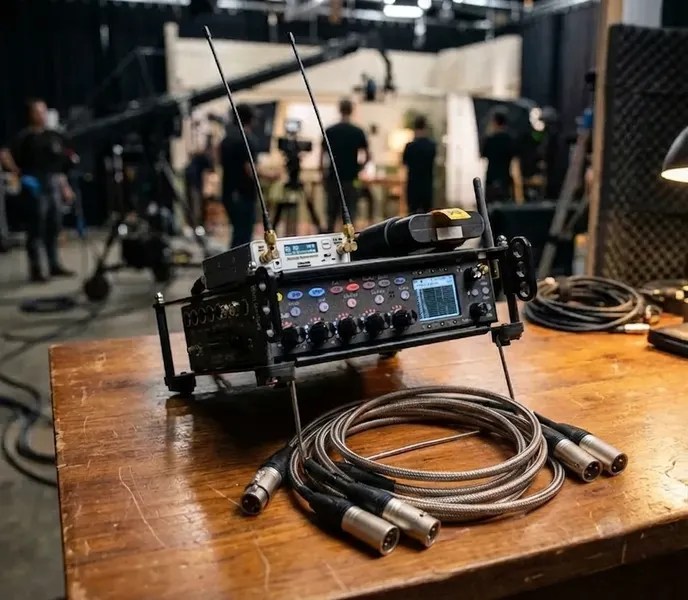
Navigating AES on the Sound Devices 833
Introduction: Why Go Digital?
The Benefit: AES (Audio Engineering Society) connections allow for a pure digital signal path from source (like a high-end digital wireless receiver or preamp) to the 833.
The Advantage: Avoiding unnecessary A-to-D (Analog-to-Digital) and D-to-A conversion stages, which can introduce noise or color the sound. (HEDD Audio)
Identifying Your AES Entry Points
There are two ways to get AES into an 833:
The "Native" Input: XLR Input 1 is capable of accepting AES3 or AES42 (for digital mics). This is perfect for a quick, single-source digital connection. (Broadcast Supply Worldwide)
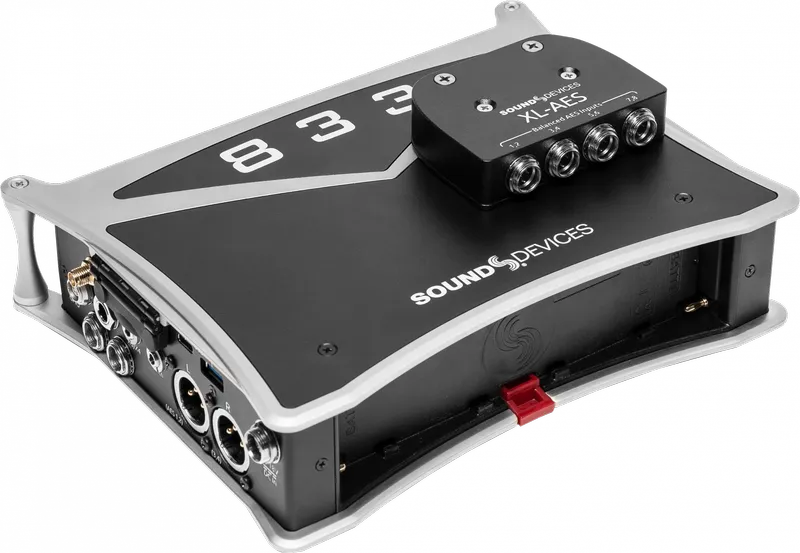
The Expansion Method (XL-AES): For more serious channel counts, introduce the XL-AES accessory. It attaches directly to the top of the 833, providing four TA3 connectors, each capable of carrying two channels of AES, for a total of eight digital inputs. (Sound Devices)
Practical Setup & Configuration
Menu Navigation: You must enable the XL-AES in the System Menu before it appears as a source. Otherwise, the 833 is expecting an analog signal. Here's a two minute explainer. (YouTube)
Routing: The 833’s fully routable architecture can easily map inputs to tracks. Once the input is enabled, you simply go to your desired channel, open the Source menu, and select the digital source (e.g., "AES 1" or the corresponding XL-AES channel).
Sample Rate Sync: When using digital inputs, the 833 becomes the "clock master" (or the source must be synced), though the 833's internal converters handle this automatically when set up correctly.
Critical Best Practices
Cable Matters: It's not difficult to emphasize the importance of using 110-ohm impedance AES cables. While a standard analog mic cable might "work" over short distances, using proper AES-rated cabling is essential to prevent data errors, dropouts, or "clicks and pops" in the recording. (Soundrolling) More on this in a bit...
AES42 vs. AES3: AES42 is for specific digital microphones that require power, while AES3 is the standard for transferring digital audio between devices. (see a recent post for more)
Gain Staging: Note, you still have digital trim control. You aren't adjusting an analog preamp, but you are adjusting the signal level within the digital domain!
Key Technical Specs
| Feature | Detail |
|---|---|
| Connector (Standard) | XLR-3 (Input 1) |
| Connector (Expansion) | TA3 (via XL-AES accessory) |
| Cable Requirement | 110-ohm balanced |
| Protocol | AES3 (2-channel) |
| 833 Flexibility | Fully routable to any track |
More on Cables
The Core Requirement: 110-Ohm Impedance
The most important technical rule is that AES3 signals require 110-ohm shielded twisted-pair cable. (Reddit)
Why it matters: Analog microphone cables typically have an impedance between 50 and 75 ohms. While they might pass a signal over a very short distance (like 1 meter), they cause "reflections" of the digital data stream. Over longer runs, this leads to bit errors, digital dropouts, and audible clicking or popping.
The "Pro" Habit: Because AES cables look identical to analog cables, it is common industry practice to label your digital cables. Use specific colors of electrical tape or colored heat-shrink tubing on the connectors to distinguish them at a glance during a high-pressure setup.
Connector Types for the 833
Depending on how you are connecting your devices, you will encounter two primary connector types:
XLR-3 (Input 1): If you are using the single digital input on the main chassis (Input 1), you need a standard XLR-F to XLR-M cable rated for 110-ohm AES digital audio.
TA3 (XL-AES Accessory): If you are using the XL-AES expansion accessory, you will need TA3-F to XLR-M (or TA3-F to TA3-M, depending on your receiver) cables. These must also be wired using 110-ohm digital-rated cable.
Best Practices: Ensuring a Bulletproof AES Workflow
Transitioning to an all-digital signal chain is one of the most effective ways to lower your noise floor and simplify your gain structure. However, AES requires a shift in mindset compared to analog workflows. Follow these best practices to ensure your digital path remains as clean and reliable as the manufacturers intended.
- Identify Your Digital Lines
Because AES cables look exactly like standard microphone cables, it is dangerously easy to mix them up in a dark bag or a busy sound cart. Establish a clear cable labeling system immediately. Whether you use colored heat-shrink, specific electrical tape, or entirely different brands of connectors, you should be able to identify a digital cable by touch or a quick glance. Never rely on "guessing" during a high-pressure setup.
Respect the 110-Ohm Standard
Do not use standard analog microphone cable for AES signals, even for short runs. While it may appear to work during a "bench test," analog cable lacks the specific impedance characteristics required to maintain data integrity. Using non-rated cable is an invitation for digital errors—resulting in intermittent dropouts, clicks, and pops that are notoriously difficult to track down once the cameras are rolling. Always use certified 110-ohm AES/EBU cable.
Master Your Gain Staging
When you move to AES, you are bypassing the analog preamp stage of the 833. This means your gain staging happens in the digital domain.
Understand the Signal Source: You are now controlling the gain of the transmitter or the preamp feeding the recorder, not the 833 itself.
Watch Your Levels: Because there is no analog saturation to "soften" a digital clip, keep a close eye on your peaks. Digital clipping is immediate and harsh. If your source level is too hot, adjust it at the receiver or the digital output stage of your source device, rather than trying to fix it at the recorder.
Manage Your Clocking
The 833 is highly capable of handling digital signals, but you must ensure your system is synchronized. In most single-recorder setups, the 833 will act as the master clock. If you notice any rhythmic "ticking" or artifacts in your signal, verify that all devices in your digital chain are synced to the same sample rate (e.g., 48kHz or 96kHz). A mismatch in sample rates is a frequent cause of digital noise.
The "Listen-Test" Ritual
Before calling "Speed" or "Action," perform a quick digital check. Because AES errors are binary—either the data arrives perfectly or it arrives with errors—you won't necessarily hear "hiss" if something is wrong. You will hear digital artifacts or silence. Use your headphones to specifically monitor the digital returns periodically, especially if you are using long cable runs or complex cabling looms.
👉 Return to RR.COM 👈