Inside Audio

shotgun

All posts tagged shotgun by Inside Audio
  • Posted on
    Professional Boom Operation for Seated Interviews

    Professional Boom Operation for Seated Interviews

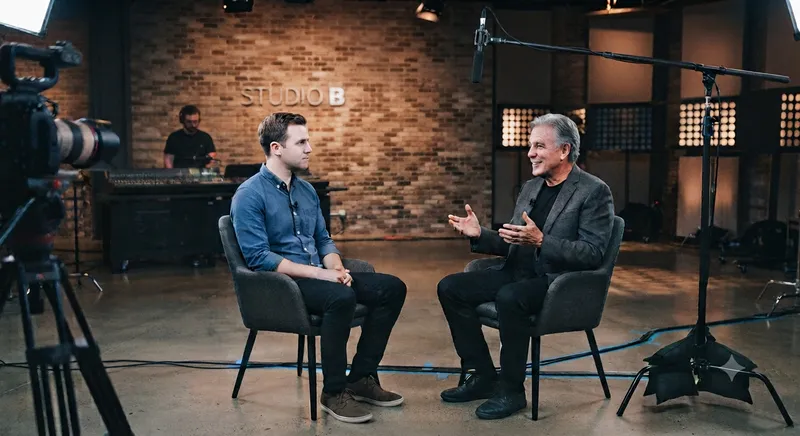
    When filming a sit-down interview, the game changes from the "active pursuit" of a handheld boom to the precision of a controlled, static environment. In this setting, the goal is unwavering consistency. You want the microphone to remain in the "sweet spot"—just above the subject's frame line and aimed at the mouth—for the duration of the interview, even if the subject leans back or gestures.

    Why 'Stand-Mounted' is King for Interviews In a sit-down scenario, handheld booming is rarely the best choice. Unless you have the superhuman ability to hold a pole perfectly still for 45 minutes, your muscles will eventually fatigue, leading to subtle changes in mic height or angle. Using a boompole holder (cradle) and C-stand is the professional standard because:

    • Audio Consistency: Every word is captured at the exact same distance and off-axis angle, making editing and leveling dialogue significantly easier.
    • Visual Confidence: You can lock the boom in place, clear the frame, and focus entirely on monitoring audio levels and environmental noise.
    • Non-Verbal Focus: Seated subjects often move their heads or lean in to emphasize points; a locked-off boom allows for subtle cradle adjustments rather than fighting pole weight.

    The Anatomy of the Interview Setup

    The C-Stand and Grip Using professional support gear provides stability that handheld operation cannot match during long takes:

    • "Righty-Tighty" Rule: Always ensure the boom holder cradle is on the side of the C-stand knuckle that tightens when the weight of the pole pulls down, preventing slips.
    • Sandbagging: Place one 15–25 lb sandbag on the longest leg of the C-stand to provide necessary stability during interviews.

    The Boompole Holder (Cradle) Precision placement is key for maintaining that professional "sweet spot":

    • Placement: Position the stand behind or to the side of the subject, booming over the top of the camera with a cradle capable of fine angle adjustments.
    • Safety Loop: Create a small service loop in your XLR cable at the cradle and secure it with gaffer tape or velcro so an accidental tug doesn't displace the mic position.

    Pro-Checklist for Seated Success To ensure professional results, follow this final check before recording:

    • The "Shadow" Sweep: Check your camera monitor to ensure a microphone shadow isn't falling across the subject’s face or background walls.
    • Distance Calibration: Aim for an optimal distance of 12 to 18 inches from the mouth; any closer risks plosives, while further away loses vocal presence.
    • The "Gesture" Buffer: Position the boom high enough that animated hand gestures won't strike it, but low enough to maintain audio intimacy.
    • Room Tone: Always record at least 60 seconds of room tone with your stand in its final position for cleaner editing later.

    When to Keep Your Hands on the Pole
    While stands are ideal for most scenarios, dynamic interviews require an active approach. If a subject is using a swivel chair or moving significantly around the set, you may need to ditch the stand and return to handheld operation; in these cases, keep your movements deliberate and slow to ensure clean audio.

    👉 Return to RR.COM 👈
  • Posted on
    Mastering the Pole: A Guide to Professional Location Audio

    Mastering the Pole: A Guide to Professional Location Audio

    In the world of location sound, the boom operator is the unsung hero. While the camera captures the visual story, your work ensures that the emotional core—the dialogue—is pristine. Achieving professional-grade audio requires more than just holding a pole; it requires a deep understanding of microphone placement, ergonomics, and, crucially, knowing when to put the pole down and use support gear.

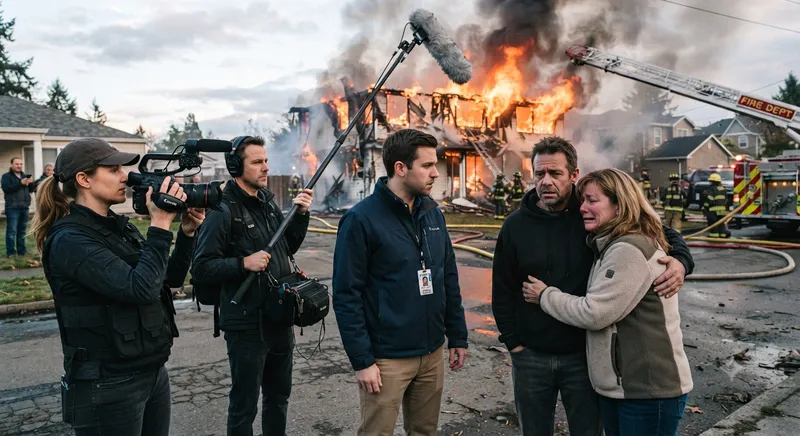
    The Art of Handheld Booming The gold standard for dialogue remains the human-operated boom. A skilled operator can anticipate actor movement, manage cable noise, and pivot the microphone to capture off-axis cues seamlessly. When operating by hand:

    • Dynamic Scenes: Any scene involving blocking, walking, or sudden actor movement.
    • Close-ups/Intimate Dialogue: You need to react to subtle inflections and head turns.
    • Tight Spaces: Where stands would be physically impossible to place.

    When to Use Support Gear While handheld is preferred, there are scenarios where a boompole holder (cradle), C-stand, and sandbags are not just helpful—they are essential for consistency and safety.

    The Boompole Holder & C-Stand A professional setup usually involves a Boompole Holder (such as a K-Tek or Ambient cradle) mounted to a sturdy C-stand. Use this equipment in the following scenarios:

    • Static Interviews: When the subject is seated or standing in one position for an extended period, a stand ensures perfect, consistent mic placement.
    • Wide Shots with Minimal Movement: If actors are stationary and you need to keep the mic just out of frame for a long take, a stand removes the physical fatigue that leads to "mic drift."
    • Solo Operation: If you are a one-person crew, you simply cannot hold the boom while monitoring levels or operating your recorder. A stand allows you to "set and forget" the microphone position safely.

    The Golden Rule of Sandbags
    If a boompole is on a stand, it must be sandbagged; this remains non-negotiable in professional environments.

    • Weight Distribution: Always place your sandbag on the leg of the C-stand that is pointing in the direction of the boom's weight.
    • Safety First: A boompole protruding into a set is a hazard. If a crew member bumps the stand, a sandbag provides the difference between a minor nudge and heavy equipment crashing into performers or expensive camera gear.
    • High-Traffic Areas: If you are filming near doorways, active walkways, or outdoors where wind could affect the pole, double-bag your stands for extra security.

    Comparison Guide: Handheld vs. Support Gear

    Feature Handheld Boompole Holder + Stand
    Adaptability Extremely High Low
    Fatigue High None
    Consistency Operator dependent Excellent
    Ideal For Action, blocking, walk-and-talks Interviews, static scenes, solo operators

    Final Pro-Tips for the Field Mastering the balance between active operation and knowing when to utilize professional support gear is what separates a novice from a seasoned sound professional.

    • Cable Management: Even when on a stand, never let your XLR cable hang loose. Use velcro ties to secure it to the stand to prevent it from acting as a "sail" in the wind or becoming a trip hazard.
    • The Shadow Check: Always check the camera monitor for shadows; a perfectly placed microphone can ruin a take if its shadow falls across an actor’s face.
    • Always Carry Extra Sandbags: You can never have too much weight on your stand. If the wind picks up or the set gets crowded, having extra bags ready keeps production moving safely and securely.

    Keep your ears open, keep your gear secure, and stay focused on that dialogue!

    👉 Return to RR.COM 👈

  • Posted on
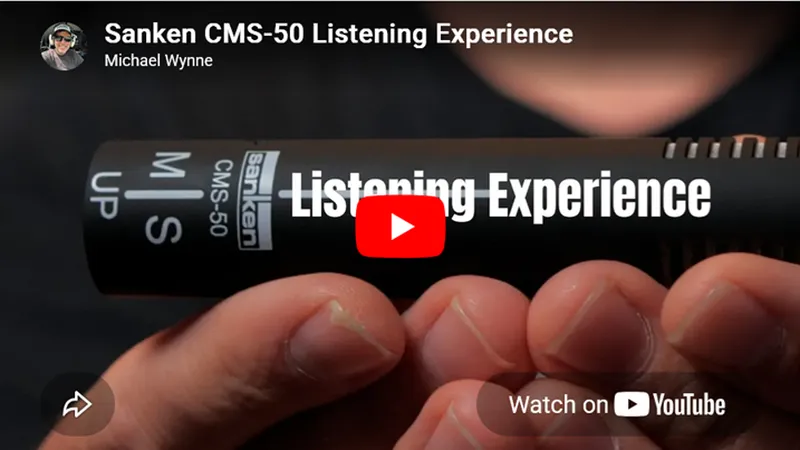
    Mastering the Sanken CMS-50: A Compact M-S Stereo Solution

    Mastering the Sanken CMS-50: A Compact M-S Stereo Solution

    When field recording requires a professional-grade stereo image without the bulk of traditional stereo microphones, the Sanken CMS-50 stands in a category of its own. It is a true M-S (Mid-Side) shotgun that delivers exceptional spatial clarity in a remarkably compact 5.4-inch chassis. (Trew Audio)

    Understanding the M-S Workflow

    Unlike "all-in-one" stereo microphones that output a pre-decoded Left/Right signal, the CMS-50 outputs discrete Mid (Cardioid) and Side (Figure-8) signals. This configuration is the gold standard for professionals who need total control over their soundscape. (John Barry)

    • The "Mid" Capsule: Captures the primary, focused sound source (similar to a standard mono shotgun).
    • The "Side" Capsule: Captures the ambient environment, providing the spatial cues necessary for a wide, natural stereo image.
    • Post-Production Flexibility: By recording these signals separately, you can adjust the "width" of your stereo image during your mix. You can go from a focused, narrow sound to an expansive, immersive environment simply by adjusting the level of the Side channel relative to the Mid channel.

    Mounting and Field Utility

    Given its tiny 4.6oz (130g) weight and short form factor, the CMS-50 is uniquely suited for mounting scenarios that would be impossible for larger shotgun mics.

    1. Low-Profile Camera Mounting

    Because the CMS-50 is only 5.4 inches long, it is an ideal companion for mirrorless or cinema cameras using wide-angle or short focal length lenses. (Sanken Microphones)

    • Avoiding Interference: You can mount this mic on-camera without worrying about it creeping into the frame of a wide lens.
    • Suspension: Because M-S microphones are highly sensitive to handling noise, you should always use a dedicated suspension mount (like the Sanken GS-23) rather than a rigid cold-shoe mount.

    2. Boom Pole Operation

    For drama and documentary work, the CMS-50 provides the reach and rejection of a shotgun with the benefit of a stereo field. (B&H)

    • Phase Coherence: Because the capsules are perfectly aligned, the CMS-50 offers excellent phase coherence, which is critical when down-mixing to mono.
    • Decoding: Ensure your recorder or mixing console is set up to decode the M-S signals. If you are recording them raw, remember:
      • Left Channel = M + S
      • Right Channel = M - S
    • Power: The CMS-50 requires standard +48V phantom power. Note that it consumes 4mA per channel, so ensure your power supply can handle both channels simultaneously for long recording sessions.

    The Sanken CMS-50 is a powerhouse for ambient recording—from field sports to complex narrative scenes. Its ability to provide "stereo-on-demand" makes it an indispensable tool for the modern sound recordist.

    👉 Return to RR.COM 👈

  • Posted on

    Mastering the Sanken CMS-50: A Compact M-S Stereo Solution

    When field recording requires a professional-grade stereo image without the bulk of traditional stereo microphones, the Sanken CMS-50 stands in a category of its own. It is a true M-S (Mid-Side) shotgun that delivers exceptional spatial clarity in a remarkably compact 5.4-inch chassis. (Trew Audio)

    Understanding the M-S Workflow

    Unlike "all-in-one" stereo microphones that output a pre-decoded Left/Right signal, the CMS-50 outputs discrete Mid (Cardioid) and Side (Figure-8) signals. This configuration is the gold standard for professionals who need total control over their soundscape. (John Barry)

    • The "Mid" Capsule: Captures the primary, focused sound source (similar to a standard mono shotgun).
    • The "Side" Capsule: Captures the ambient environment, providing the spatial cues necessary for a wide, natural stereo image.
    • Post-Production Flexibility: By recording these signals separately, you can adjust the "width" of your stereo image during your mix. You can go from a focused, narrow sound to an expansive, immersive environment simply by adjusting the level of the Side channel relative to the Mid channel.

    Mounting and Field Utility

    Given its tiny 4.6oz (130g) weight and short form factor, the CMS-50 is uniquely suited for mounting scenarios that would be impossible for larger shotgun mics.

    1. Low-Profile Camera Mounting

    Because the CMS-50 is only 5.4 inches long, it is an ideal companion for mirrorless or cinema cameras using wide-angle or short focal length lenses. (Sanken Microphones)

    • Avoiding Interference: You can mount this mic on-camera without worrying about it creeping into the frame of a wide lens.
    • Suspension: Because M-S microphones are highly sensitive to handling noise, you should always use a dedicated suspension mount (like the Sanken GS-23) rather than a rigid cold-shoe mount.

    2. Boom Pole Operation

    For drama and documentary work, the CMS-50 provides the reach and rejection of a shotgun with the benefit of a stereo field. (B&H)

    • Phase Coherence: Because the capsules are perfectly aligned, the CMS-50 offers excellent phase coherence, which is critical when down-mixing to mono.
    • Decoding: Ensure your recorder or mixing console is set up to decode the M-S signals. If you are recording them raw, remember:
      • Left Channel = M + S
      • Right Channel = M - S
    • Power: The CMS-50 requires standard +48V phantom power. Note that it consumes 4mA per channel, so ensure your power supply can handle both channels simultaneously for long recording sessions.

    The Sanken CMS-50 is a powerhouse for ambient recording—from field sports to complex narrative scenes. Its ability to provide "stereo-on-demand" makes it an indispensable tool for the modern sound recordist.

    👉 Return to RR.COM 👈

  • Posted on
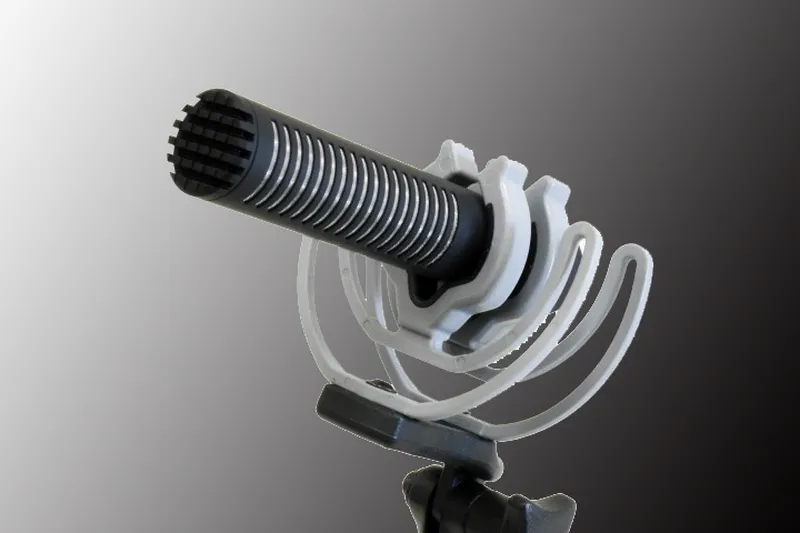
    The Ultimate Tiny Workhorse: Why the Sanken CS-M1 Belongs in Your Audio Bag

    The Ultimate Tiny Workhorse: Why the Sanken CS-M1 Belongs in Your Audio Bag

    If you’ve ever had to boom a scene in a room with a 7-foot ceiling, or tried to rig a high-end shotgun to a compact mirrorless camera, you know the struggle. Standard shotgun microphones are fantastic until you run out of physical space.

    Enter the Sanken CS-M1. It is an ultra-compact shotgun mic that punches way above its weight class, delivering that legendary Sanken reach in a body that feels impossibly small.

    The Specs: Tiny Footprint, Massive Audio Don't let the size fool you. Sanken didn't strip out the professional internals to get this tiny form factor; they just engineered it smarter.

    Attribute Specification Why It Matters
    Length 4.1 inches (103 mm) Shorter than most smartphone screens; never pokes into your frame.
    Weight 1.9 oz (55 g) Weighs next to nothing on a boom pole, saving your shoulders on 12-hour days.
    Polar Pattern Supercardioid / Lobar ncredible off-axis rejection without the "hollow echo" effect of longer tubes.
    Max SPL 137 dB SPL Handles loud sound effects or sudden shouts without clipping.
    Self-Noise 16 dB-A Exceptionally quiet, giving you clean dialogue tracks even in quiet rooms.

    Where the CS-M1 Absolutely Shines

    1. Low-Ceiling Interiors & Tight Spaces

    Longer interference-tube shotguns (like the industry-standard Sennheiser MKH416) are notorious for sounding phasey and unnatural indoors when placed too close to a ceiling or wall. The CS-M1 uses a unique, short design that avoids those nasty acoustic reflections, making it your secret weapon for car interiors, tight bathrooms, or low-overhead indie sets.

    2. The Ultimate On-Camera Scratch & Run-and-Gun Mic

    If you run a small camera rig, mounting a massive shotgun can throw off your gimbal balance or accidentally peek into the top of a wide-angle lens. The CS-M1 mounts completely flush, sits behind the front edge of almost any short lens, and gives you broadcast-quality audio directly to your camera preamp.

    3. Natural Dialogue That Blends Perfectly

    Many sound mixers who rely on the legendary Sanken CS-3e keep the CS-M1 as a plant mic or secondary boom because the sonic signatures match beautifully. It has a slightly bright, crisp top-end presence that slices right through ambient environmental noise, meaning less work for you (or your editor) in post-production.

    Pro Tip from the Field: Toss the cheap foam windscreen that comes in the box. Because the CS-M1 is so lightweight and short, it is sensitive to wind and sudden movements. Pair it immediately with a high-quality shockmount (like a Rycote InVision) and a proper fur or spacer-bubble windshield for outdoor use.

    The Verdict

    The Sanken CS-M1 isn’t just a "niche" microphone for tiny spaces—for many documentary filmmakers and run-and-gun shooters, it has become their main, everyday boom mic. It offers pristine, high-output Japanese engineering at a footprint that won't weigh down your kit or your crew.