
- Posted on
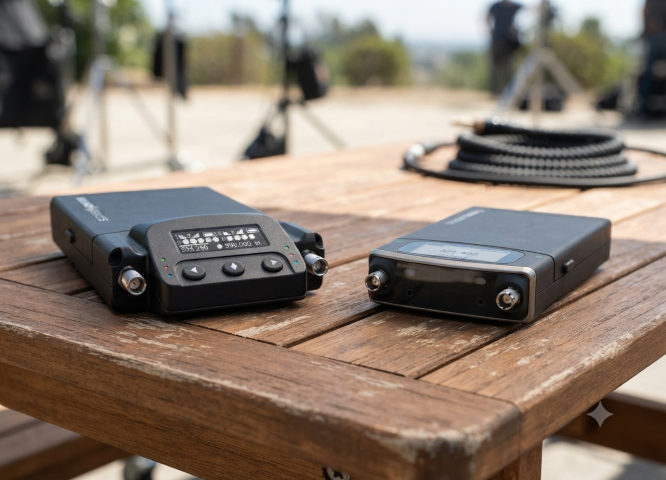
Seamless Synchronization: Integrating the Astral ARX2 with the A20-TX
The true power of the Sound Devices Astral ecosystem is realized when the ARX2 receiver is paired with the A20-TX transmitter. While the ARX2 handles the heavy lifting of signal reception, the A20-TX brings a unique set of technical advantages that simplify the workflow for the boom operator or talent.
Here is how these two units work in tandem to create a robust, high-fidelity wireless link.
1. Unified Gain Management with GainForward
The most significant operational advantage when pairing the ARX2 with the A20-TX is the GainForward architecture.
Traditionally, sound mixers have had to set the gain at the transmitter (often buried under wardrobe) and then trim it again at the mixer. With the ARX2 and A20-TX, you set the gain once at the receiver or directly from your 8-Series mixer. Any subsequent adjustments made on the mixer are effectively managing the transmitter’s internal preamp stage.
2. Full Control via Remote
The ARX2 acts as a central command hub for the A20-TX. When paired, you can remotely control essential transmitter settings directly from the receiver interface or your 8-Series mixer, including:
RF Power Levels: Toggle between output powers to conserve battery or boost range as needed.
Input Mute: Remotely kill the mic signal for talent privacy or to avoid unwanted audio during scene changes.
A20-TX Sleep Mode: Conserve precious battery life between takes by putting the transmitter into sleep mode remotely, then waking it back up just before the director calls "Action."
3. Digital Transmission and Latency
The A20-TX transmits a full-range, 100% digital signal that integrates seamlessly with the ARX2’s processing chain. Because the entire path is digital—from the A20-TX preamp to the ARX2 output—there is no need for traditional analog companding.
- Latency: The system provides extremely low, fixed-latency performance, which is vital when mixing talent on a wireless lavalier that may be audible alongside a boom microphone in the same scene. This prevents the "comb filtering" or phasing issues that can occur with variable-latency digital wireless systems.
4. Shared Metadata and Status Monitoring
Integration goes beyond just audio. The ARX2 receives telemetry data from the A20-TX, which is displayed directly on your monitoring screen:
Battery Status: Real-time, accurate battery life remaining.
RF Signal Integrity: Visual indicators of signal strength (RSSI) and link quality, allowing you to proactively move antennas or reposition talent before a drop-out occurs.
Frequency Coordination: The ARX2 can push frequency changes to the A20-TX automatically, ensuring both units remain locked to the same channel without manual entry on the transmitter.
Pro-Tip for Configuration
When pairing your A20-TX to the ARX2, ensure you are utilizing the A20-Remote app if you are moving between different setups. The app allows for rapid deployment and firmware management, ensuring that your A20-TX units are always optimized for the specific modulation and frequency hopping patterns required by the ARX2 in your specific region.
Quick Start: Pairing the A20-TX to the ARX2
Getting your transmitter and receiver linked and ready for production is a straightforward process. Follow these steps to establish a secure, digital link between your A20-TX and ARX2.
Step 1: Set the Frequency on the ARX2
Navigate to the Receiver Menu on your ARX2 (or via your 8-Series mixer display).
Select the desired channel you wish to pair.
Choose a clear frequency using the AutoAssign feature or by manual selection to ensure the channel is free from interference.
Step 2: Initiate Pairing Mode on the A20-TX
Ensure your A20-TX is powered on.
Locate the Pairing Button (typically found on the side or within the menu interface depending on your firmware version).
Press and hold the button until the status LED begins to flash in a specific "pairing" pattern (usually a rapid pulse), indicating the unit is ready to receive data.
Step 3: Sync via the ARX2
While the A20-TX is in pairing mode, navigate to the Pairing/Sync menu on your ARX2.
Select "Start Sync" (or the equivalent command on your mixer interface).
The ARX2 will transmit the frequency, modulation, and metadata settings to the A20-TX wirelessly.
Step 4: Verify the Link
Once the sync is successful, the status LED on the A20-TX will change to a solid state (typically green or blue, indicating a locked link).
Observe the ARX2 receiver display. You should see the RF signal meter climb to full strength and the audio modulation meter reacting to sound input at the A20-TX microphone.
Perform a quick "walk test" to confirm audio clarity and consistent signal strength in your environment.
Note: If the sync fails, ensure both units are updated to the latest firmware version. Using the A20-Remote app can also provide a visual confirmation that the transmitter has successfully adopted the new frequency parameters from the receiver.
👉 Return to RR.COM 👈