Inside Audio

People

Information about crew members for location and studio work.

  • Posted on
    Professional Boom Operation for Seated Interviews

    Professional Boom Operation for Seated Interviews

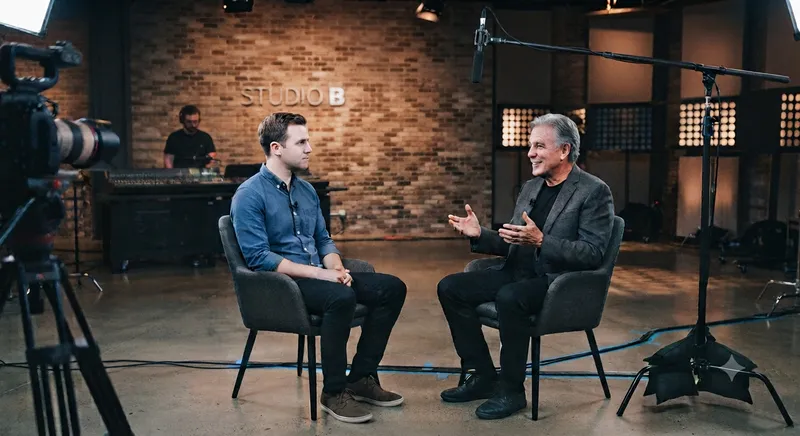
    When filming a sit-down interview, the game changes from the "active pursuit" of a handheld boom to the precision of a controlled, static environment. In this setting, the goal is unwavering consistency. You want the microphone to remain in the "sweet spot"—just above the subject's frame line and aimed at the mouth—for the duration of the interview, even if the subject leans back or gestures.

    Why 'Stand-Mounted' is King for Interviews In a sit-down scenario, handheld booming is rarely the best choice. Unless you have the superhuman ability to hold a pole perfectly still for 45 minutes, your muscles will eventually fatigue, leading to subtle changes in mic height or angle. Using a boompole holder (cradle) and C-stand is the professional standard because:

    • Audio Consistency: Every word is captured at the exact same distance and off-axis angle, making editing and leveling dialogue significantly easier.
    • Visual Confidence: You can lock the boom in place, clear the frame, and focus entirely on monitoring audio levels and environmental noise.
    • Non-Verbal Focus: Seated subjects often move their heads or lean in to emphasize points; a locked-off boom allows for subtle cradle adjustments rather than fighting pole weight.

    The Anatomy of the Interview Setup

    The C-Stand and Grip Using professional support gear provides stability that handheld operation cannot match during long takes:

    • "Righty-Tighty" Rule: Always ensure the boom holder cradle is on the side of the C-stand knuckle that tightens when the weight of the pole pulls down, preventing slips.
    • Sandbagging: Place one 15–25 lb sandbag on the longest leg of the C-stand to provide necessary stability during interviews.

    The Boompole Holder (Cradle) Precision placement is key for maintaining that professional "sweet spot":

    • Placement: Position the stand behind or to the side of the subject, booming over the top of the camera with a cradle capable of fine angle adjustments.
    • Safety Loop: Create a small service loop in your XLR cable at the cradle and secure it with gaffer tape or velcro so an accidental tug doesn't displace the mic position.

    Pro-Checklist for Seated Success To ensure professional results, follow this final check before recording:

    • The "Shadow" Sweep: Check your camera monitor to ensure a microphone shadow isn't falling across the subject’s face or background walls.
    • Distance Calibration: Aim for an optimal distance of 12 to 18 inches from the mouth; any closer risks plosives, while further away loses vocal presence.
    • The "Gesture" Buffer: Position the boom high enough that animated hand gestures won't strike it, but low enough to maintain audio intimacy.
    • Room Tone: Always record at least 60 seconds of room tone with your stand in its final position for cleaner editing later.

    When to Keep Your Hands on the Pole
    While stands are ideal for most scenarios, dynamic interviews require an active approach. If a subject is using a swivel chair or moving significantly around the set, you may need to ditch the stand and return to handheld operation; in these cases, keep your movements deliberate and slow to ensure clean audio.

    👉 Return to RR.COM 👈
  • Posted on
    Mastering the Pole: A Guide to Professional Location Audio

    Mastering the Pole: A Guide to Professional Location Audio

    In the world of location sound, the boom operator is the unsung hero. While the camera captures the visual story, your work ensures that the emotional core—the dialogue—is pristine. Achieving professional-grade audio requires more than just holding a pole; it requires a deep understanding of microphone placement, ergonomics, and, crucially, knowing when to put the pole down and use support gear.

    The Art of Handheld Booming The gold standard for dialogue remains the human-operated boom. A skilled operator can anticipate actor movement, manage cable noise, and pivot the microphone to capture off-axis cues seamlessly. When operating by hand:

    • Dynamic Scenes: Any scene involving blocking, walking, or sudden actor movement.
    • Close-ups/Intimate Dialogue: You need to react to subtle inflections and head turns.
    • Tight Spaces: Where stands would be physically impossible to place.

    When to Use Support Gear While handheld is preferred, there are scenarios where a boompole holder (cradle), C-stand, and sandbags are not just helpful—they are essential for consistency and safety.

    The Boompole Holder & C-Stand A professional setup usually involves a Boompole Holder (such as a K-Tek or Ambient cradle) mounted to a sturdy C-stand. Use this equipment in the following scenarios:

    • Static Interviews: When the subject is seated or standing in one position for an extended period, a stand ensures perfect, consistent mic placement.
    • Wide Shots with Minimal Movement: If actors are stationary and you need to keep the mic just out of frame for a long take, a stand removes the physical fatigue that leads to "mic drift."
    • Solo Operation: If you are a one-person crew, you simply cannot hold the boom while monitoring levels or operating your recorder. A stand allows you to "set and forget" the microphone position safely.

    The Golden Rule of Sandbags
    If a boompole is on a stand, it must be sandbagged; this remains non-negotiable in professional environments.

    • Weight Distribution: Always place your sandbag on the leg of the C-stand that is pointing in the direction of the boom's weight.
    • Safety First: A boompole protruding into a set is a hazard. If a crew member bumps the stand, a sandbag provides the difference between a minor nudge and heavy equipment crashing into performers or expensive camera gear.
    • High-Traffic Areas: If you are filming near doorways, active walkways, or outdoors where wind could affect the pole, double-bag your stands for extra security.

    Comparison Guide: Handheld vs. Support Gear

    Feature Handheld Boompole Holder + Stand
    Adaptability Extremely High Low
    Fatigue High None
    Consistency Operator dependent Excellent
    Ideal For Action, blocking, walk-and-talks Interviews, static scenes, solo operators

    Final Pro-Tips for the Field Mastering the balance between active operation and knowing when to utilize professional support gear is what separates a novice from a seasoned sound professional.

    • Cable Management: Even when on a stand, never let your XLR cable hang loose. Use velcro ties to secure it to the stand to prevent it from acting as a "sail" in the wind or becoming a trip hazard.
    • The Shadow Check: Always check the camera monitor for shadows; a perfectly placed microphone can ruin a take if its shadow falls across an actor’s face.
    • Always Carry Extra Sandbags: You can never have too much weight on your stand. If the wind picks up or the set gets crowded, having extra bags ready keeps production moving safely and securely.

    Keep your ears open, keep your gear secure, and stay focused on that dialogue!

    👉 Return to RR.COM 👈

  • Posted on
    Why Your Production Needs a Professional Sound Person

    Beyond the "Record" Button: Why Your Production Needs a Professional Sound Person

    In the fast-paced world of film and video production, it is easy to view audio as a "set and forget" component. You press record, you frame your shot, and you hope for the best. However, as any seasoned producer will tell you, poor audio is the fastest way to ruin an otherwise beautiful visual project.

    Hiring a professional sound person isn't just about someone holding a boom pole—it’s about bringing in a specialist who treats sound as a critical, foundational element of your production’s quality. (Gigantic Studios, NYC)

    The Value of a Pro: More Than Just "Good Sound"

    A professional audio engineer brings a layer of technical assurance and creative foresight that elevates a project from amateur to professional grade:

    • Flawless Consistency: They ensure that dialogue levels, tone, and ambient noise floors remain consistent across every take, making the editor’s job significantly easier and the final product much more immersive.
    • Problem Solving in Real-Time: From unexpected wind noise to the hum of a distant refrigerator, a pro identifies potential issues before they become permanent problems in your recording.
    • Workflow Efficiency: They bring industry-standard gear that doesn't just record—it integrates. By managing the complexities of metadata and synchronization, they save your post-production team hours (or even days) of manual syncing and frustration.

    The Backbone of My Modern Workflow: Deity Timecode

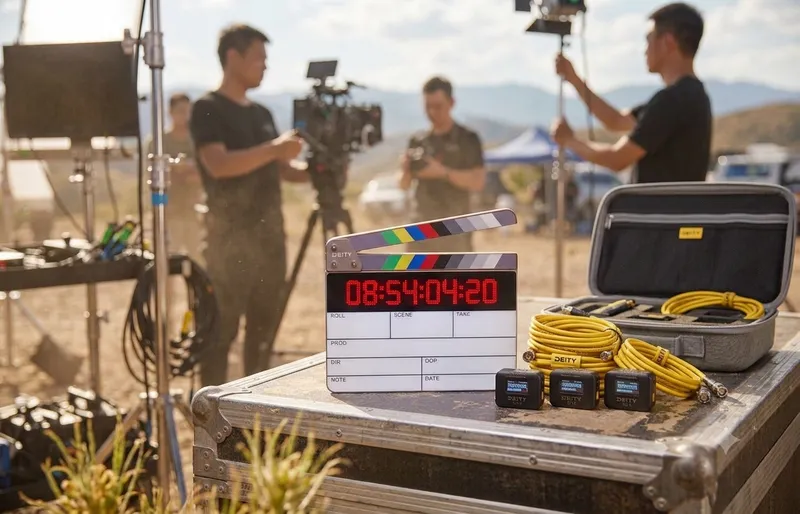
    One of the most significant ways a professional sound person streamlines your production is through the use of high-end timecode synchronization. When I am on set, my toolkit relies on the Deity SL-1 Smart Slate and Deity TC-1 Timecode Boxes.

    These tools aren't just accessories; they are the heartbeat of a synced production.

    Deity SL-1 Smart Slate: The Professional’s Reference The SL-1 is a game-changer for any production. It’s not just a clapperboard; it’s a high-precision timecode generator. With its anti-glare, dry-erase surface and a bright, dimmable LED dot-matrix display, it provides a frame-accurate reference that editors can see instantly. Because it supports all SMPTE timecode formats and communicates wirelessly via Bluetooth and 2.4 GHz, it ensures that your audio and video are locked together from the moment the clapper closes. (No Film School)

    Deity TC-1 Timecode Boxes: Seamless Connectivity The magic truly happens with the Deity TC-1. These compact powerhouses bring "Hollywood-level" sync to productions of any scale:

    • Universal Compatibility: Whether you are using a top-tier cinema camera, a professional audio recorder, or a compact mirrorless setup, the TC-1 fits right in. It connects effortlessly to mixers, recorders, and cameras via its locking 3.5mm TRS or other professional adapters, ensuring a secure, reliable connection that won't get knocked loose mid-take. (No Film School)
    • Wireless Freedom: With the Sidus Audio app, I can control up to 20 devices from up to 250 feet away. I can jam-sync every camera and audio source on set wirelessly, ensuring everyone is on the same clock. (Lens Rental)
    • Drift-Free Precision: The TC-1 features a highly accurate TXCO (Temperature Compensated Crystal Oscillator), providing less than one frame of drift over a 72-hour period. You can trust that your sync will be as tight at the end of a long day as it was at the very first take. (Deity Microphones)

    The Bottom Line

    When you hire a sound professional, you aren't just paying for labor—you're investing in peace of mind. By leveraging advanced tools like the Deity SL-1 and TC-1 ecosystem, your sound team ensures that your technical infrastructure is invisible, letting your creative vision take center stage.

    Don't let sync issues or poor audio quality be the thing that holds your next project back. Bring in a professional who understands that great film starts with great sound.

    Are you currently planning any upcoming shoots where we could integrate this timecode workflow to streamline your post-production? Contact me here. 👉 Return to RR.COM 👈