- Posted on
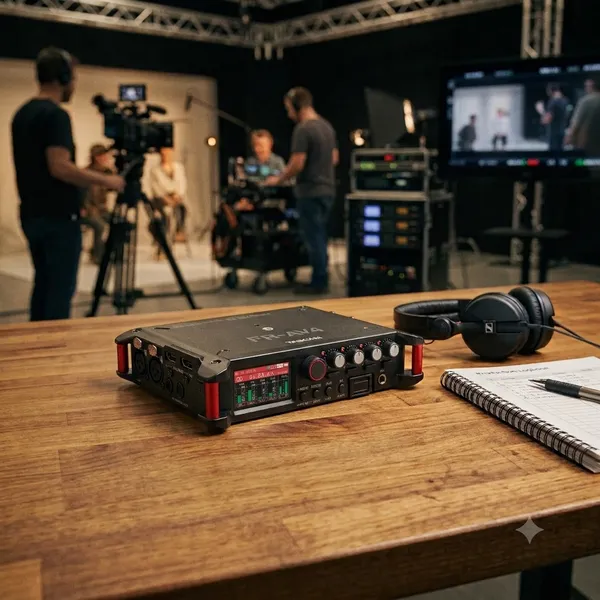
Bridging the Gap Between HDMI and Pro Audio: A Technical Deep Dive into the TASCAM FR-AV4
For years, location sound recordists and videographers have operated in parallel but separate universes. On one side, we have high-fidelity, dual-ADC, 32-bit float audio recorders. On the other, we have ultra-high-definition 4K/8K camera ecosystems. Syncing the two usually requires expensive tentacle-style timecode boxes or tedious post-production alignment.
Enter the TASCAM FR-AV4.
Positioned as a direct competitor to the Zoom F6 and Sound Devices MixPre series, this 4-channel, 6-track field recorder introduces something we haven’t quite seen in this form factor: native, clock-synchronized HDMI architecture. Let’s break down the engineering and hardware architecture under the hood. (NewsShooter)
1. The Core Audio Architecture: Dynamic Range & Gain Stages
The FR-AV4 features four XLR/TRS combo inputs backed by TASCAM’s proprietary Ultra HDDA (High Definition Discrete Architecture) preamps. (Tascam)
- The Math on Noise: The preamps achieve an Equivalent Input Noise (EIN) of -127 dBu. When paired with high-sensitivity condenser microphones (like a Sennheiser MKH50), the self-noise of the recorder is essentially negligible.
- Dual A/D Converters: Each channel utilizes a dual analog-to-digital converter setup feeding a 32-bit float pipeline.
- Headroom and Clipping: The system boasts an analog dynamic range of 133 dB. Maximum input levels sit at +4 dBu for microphone signals and a massive +24 dBu for line-level inputs. Because of the 32-bit float integration, clipping at the converter level is mathematically impossible.
⚠️ Technical Reminder: While 32-bit float prevents digital clipping at the recorder stage, it cannot save you if you over-drive the physical capsule of the microphone itself. Proper mic positioning and attenuation still matter.
2. The HDMI Ecosystem: Clock Sync & Video Passthrough
The most compelling engineering choice on the FR-AV4 is the inclusion of twin HDMI 2.1 ports (In / Out). This isn't just for routing video; it serves as a digital handshake for absolute hardware synchronization. (PodcastVideos)
Video Passthrough & Audio Embedding The FR-AV4 supports uncompressed 4K and 8K video passthrough. As the video signal transits through the device, the FR-AV4 can inject its pristine, multi-track audio directly into the HDMI metadata stream. If you are routing the output to a field monitor/recorder like an Atomos Shogun or Blackmagic Video Assist, your high-res audio is printed directly into the video file simultaneously.
Master Clock and Record Triggers By utilizing a shared master clock over HDMI (TASCAM Patent No. 6547550), phase drift between video frames and audio samples is eliminated. Furthermore, the FR-AV4 reads the camera’s flags, meaning pressing "Record" on your Sony, Canon, or Nikon camera instantly fires up the 6-track recording engine on the TASCAM.
3. Timecode Architecture & Thermal Performance
For workflows not utilizing HDMI, the FR-AV4 houses a fully independent timecode generator capable of LTC Jam Sync.
- The Component: It utilizes a high-precision Temperature-Compensated Crystal Oscillator (TCXO).
- The Caveat: The TCXO is strictly rated for a standard operating environment of 0°C to 40°C. If you are shooting a documentary in sub-zero environments, the lack of a specialized temperature-controlled oscillator means you should expect slight timecode drift, requiring more frequent jams.
4. Digital Signal Processing (DSP) & Ecosystem Expansion
The unit is capable of recording up to 192 kHz sampling rates across 6 tracks (Inputs 1–4 + a stereo master bus) onto SDXC cards up to 512 GB.
- Onboard DSP: Every channel features independent low-cut filtering, 4-band EQ, noise gating, and digital limiting before the master bus.
- Auto Mix (Firmware v1.10+): TASCAM implemented a gain-sharing Auto Mix function. It dynamically attenuates unused open microphones to drastically mitigate comb filtering and background ambient noise during multi-person dialogue.
- Ambisonics: For spatial audio, VR, and 360 production, the unit supports native decoding and recording of A-format and B-format (AmbiX / FuMa).
- HDMI Cascading: If 4 XLR inputs aren't enough, you can cascade two FR-AV4 units together via HDMI. This links their internal sample clocks and unifies the record trigger, expanding your system to an 8-input field rig.
5. Power Management & Data Safety
Field recording demands redundancy. The FR-AV4 addresses this via dual-source options and an automated file infrastructure:
- USB-C Bus Power: Can run indefinitely on a standard Power Delivery (PD) power bank.
- Quick-Swap AA Trays: Uses the BH-4AA sled. Running 2450mAh NiMH batteries with a single +48V phantom-powered mic will net you roughly 7 hours of runtime.
- The 20-Second Safety Net: To protect against catastrophic power failure (e.g., a pulled cable), the FR-AV4 utilizes an Auto File Save algorithm that closes and flushes the WAV header to the SDXC card every 20 seconds. If power cuts, you lose a maximum of 20 seconds of audio.
Technical Summary Matrix
| Feature | Specification / Technical Detail |
|---|---|
| Inputs | 4x XLR/TRS Combo (Ultra HDDA) |
| Max Track Count | 6 Tracks (4 Iso + Stereo Mix) |
| Dynamic Range | 133 dB (Dual A/D Converters) |
| Preamp EIN | -127 dBu |
| Bit Depth / Sample Rate | 32-bit Float up to 192 kHz |
| HDMI Support | HDMI 2.1 (4K/8K Passthrough, Clock Sync, Rec Trigger) |
| Wireless Control | App Control & BT Audio Monitoring via optional AK-BT2 |
6. Ecosystem Expansion: Wireless Control & The Bluetooth Conundrum
While the physical chassis of the FR-AV4 handles traditional wired inputs, expanding into modern, agile field workflows requires unlocking its wireless capabilities. This is achieved via a dedicated front-panel slot that accepts the optional AK-BT2 Bluetooth 5.0 (Low Energy) adapter.
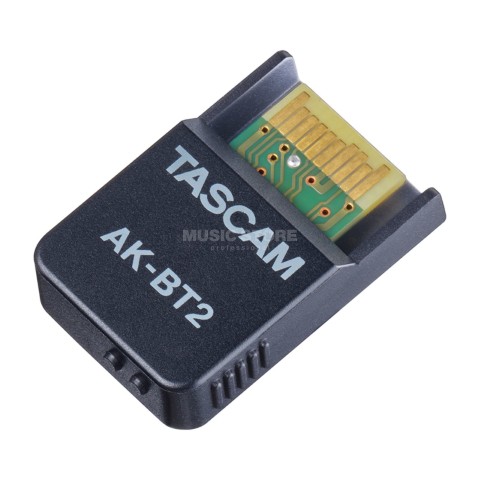 (Image property of Musictstore.com)
Plugging in this dongle bifurcates the recorder’s operational capabilities into two distinct wireless domains: Control/Metadata Data Streams and Real-Time Linear Audio Monitoring.
The TASCAM Recorder Connect App Pipeline
Operating over Bluetooth LE, the free TASCAM Recorder Connect app (available across iOS, iPadOS, and Android) shifts the FR-AV4 from a solo bag-recorder to a multi-unit node system.
- Multi-Unit Topology (REC-LINK): The app can establish simultaneous control links with up to five distinct TASCAM devices (including combinations of the FR-AV4, the 2-channel FR-AV2, and the DR-10L Pro pocket recorders). The integrated REC-LINK function allows you to issue a master global transport command—punching record on the app or on any hardware unit instantaneously flags record across all five synchronized nodes.
- Metadata Inject Engine: Rather than fighting the tiny 1.9-inch hardware touchscreen to name takes, the app allows engineers to rapidly input and edit industry-standard iXML and BEXT metadata (Project Name, Scene, Take, and custom Notes) directly from a tablet or smartphone. This metadata prints cleanly into the broadcast WAV headers in real time.
- Remote UI Visualization: Production mixers can monitor input status and view scrolling, real-time visual waveforms across all channels simultaneously from up to roughly 30 feet away, saving the mixer from constantly having to peek over the camera op's shoulder.
Wireless Audio Monitoring & Atomos Sync The AK-BT2 also allows the FR-AV4 to broadcast audio wirelessly to standard Bluetooth headphones, earbuds, or studio monitors, opening up a highly flexible dual-monitoring workflow:
💡 Dual Monitor Configuration: The hardware internal amplifier allows the 3.5mm physical headphone jack and the AK-BT2 wireless transmitter to work in parallel. Two crew members (e.g., the sound recordist and the director) can monitor the source mix simultaneously without a physical hardware splitter
To balance the volatile nature of Bluetooth RF environments, TASCAM allows you to select from three distinct optimization modes inside the wireless menu:
Connectivity Priority: Prioritizes link stability by aggressively buffering data packets—ideal for congested RF environments but adds a significant latency penalty.
Sound Quality Priority: Allocates maximum bandwidth to the standard A2DP / SBC codec stream for high-fidelity critical listening.
Latency Priority: Drops the internal buffer size to tighten the sync window between the live acoustic environment and the monitor output.
The Reality of Bluetooth - Latency on Set
From a strict engineering standpoint, developers must be candid about the limitations of standard Bluetooth audio transmission. Because the AK-BT2 utilizes standard Bluetooth 5.0 (SBC codec) rather than proprietary ultra-low-latency 2.4 GHz protocols, there will always be a noticeable latency delay.
While the latency mode mitigates this as much as possible, monitoring dialogue via Bluetooth earbuds will introduce a subtle lip-sync delay relative to the raw video frame or real-life speech. For dialogue mixers trying to spot subtle microphone rustle or clothing noise exactly when it happens, the wired 3.5mm zero-latency output remains mandatory. The Bluetooth audio feed should be reserved for reference monitoring or directing staff who don't require microsecond phase alignment.
Finally, for timecode-focused sets, the AK-BT2 pulls double duty by establishing a wireless sync handshake with supported Atomos UltraSync BLUE devices, providing a highly reliable wireless timecode bridge alongside the app data. (B&H)
Suggested Video for Deeper Context For a visual and procedural walk-through of how the front-panel mixer operates and how to interface these modules, check out this Tascam FR-AV4 Overview & Features Video. It provides an excellent layout breakdown showing exactly where the optional AK-BT2 installs beneath the master volume knobs.
The Verdict
The TASCAM FR-AV4 represents a massive architectural pivot. While it lacks some of the premium headphone amplifier power found in the Sound Devices MixPre series, its unique ability to live cleanly inside an HDMI video workflow makes it incredibly disruptive for modern multi-cam indie film and documentary sets.
👉 Return to RR.COM 👈